Haul Update: Milk Makeup Matte Bronzer in Baked

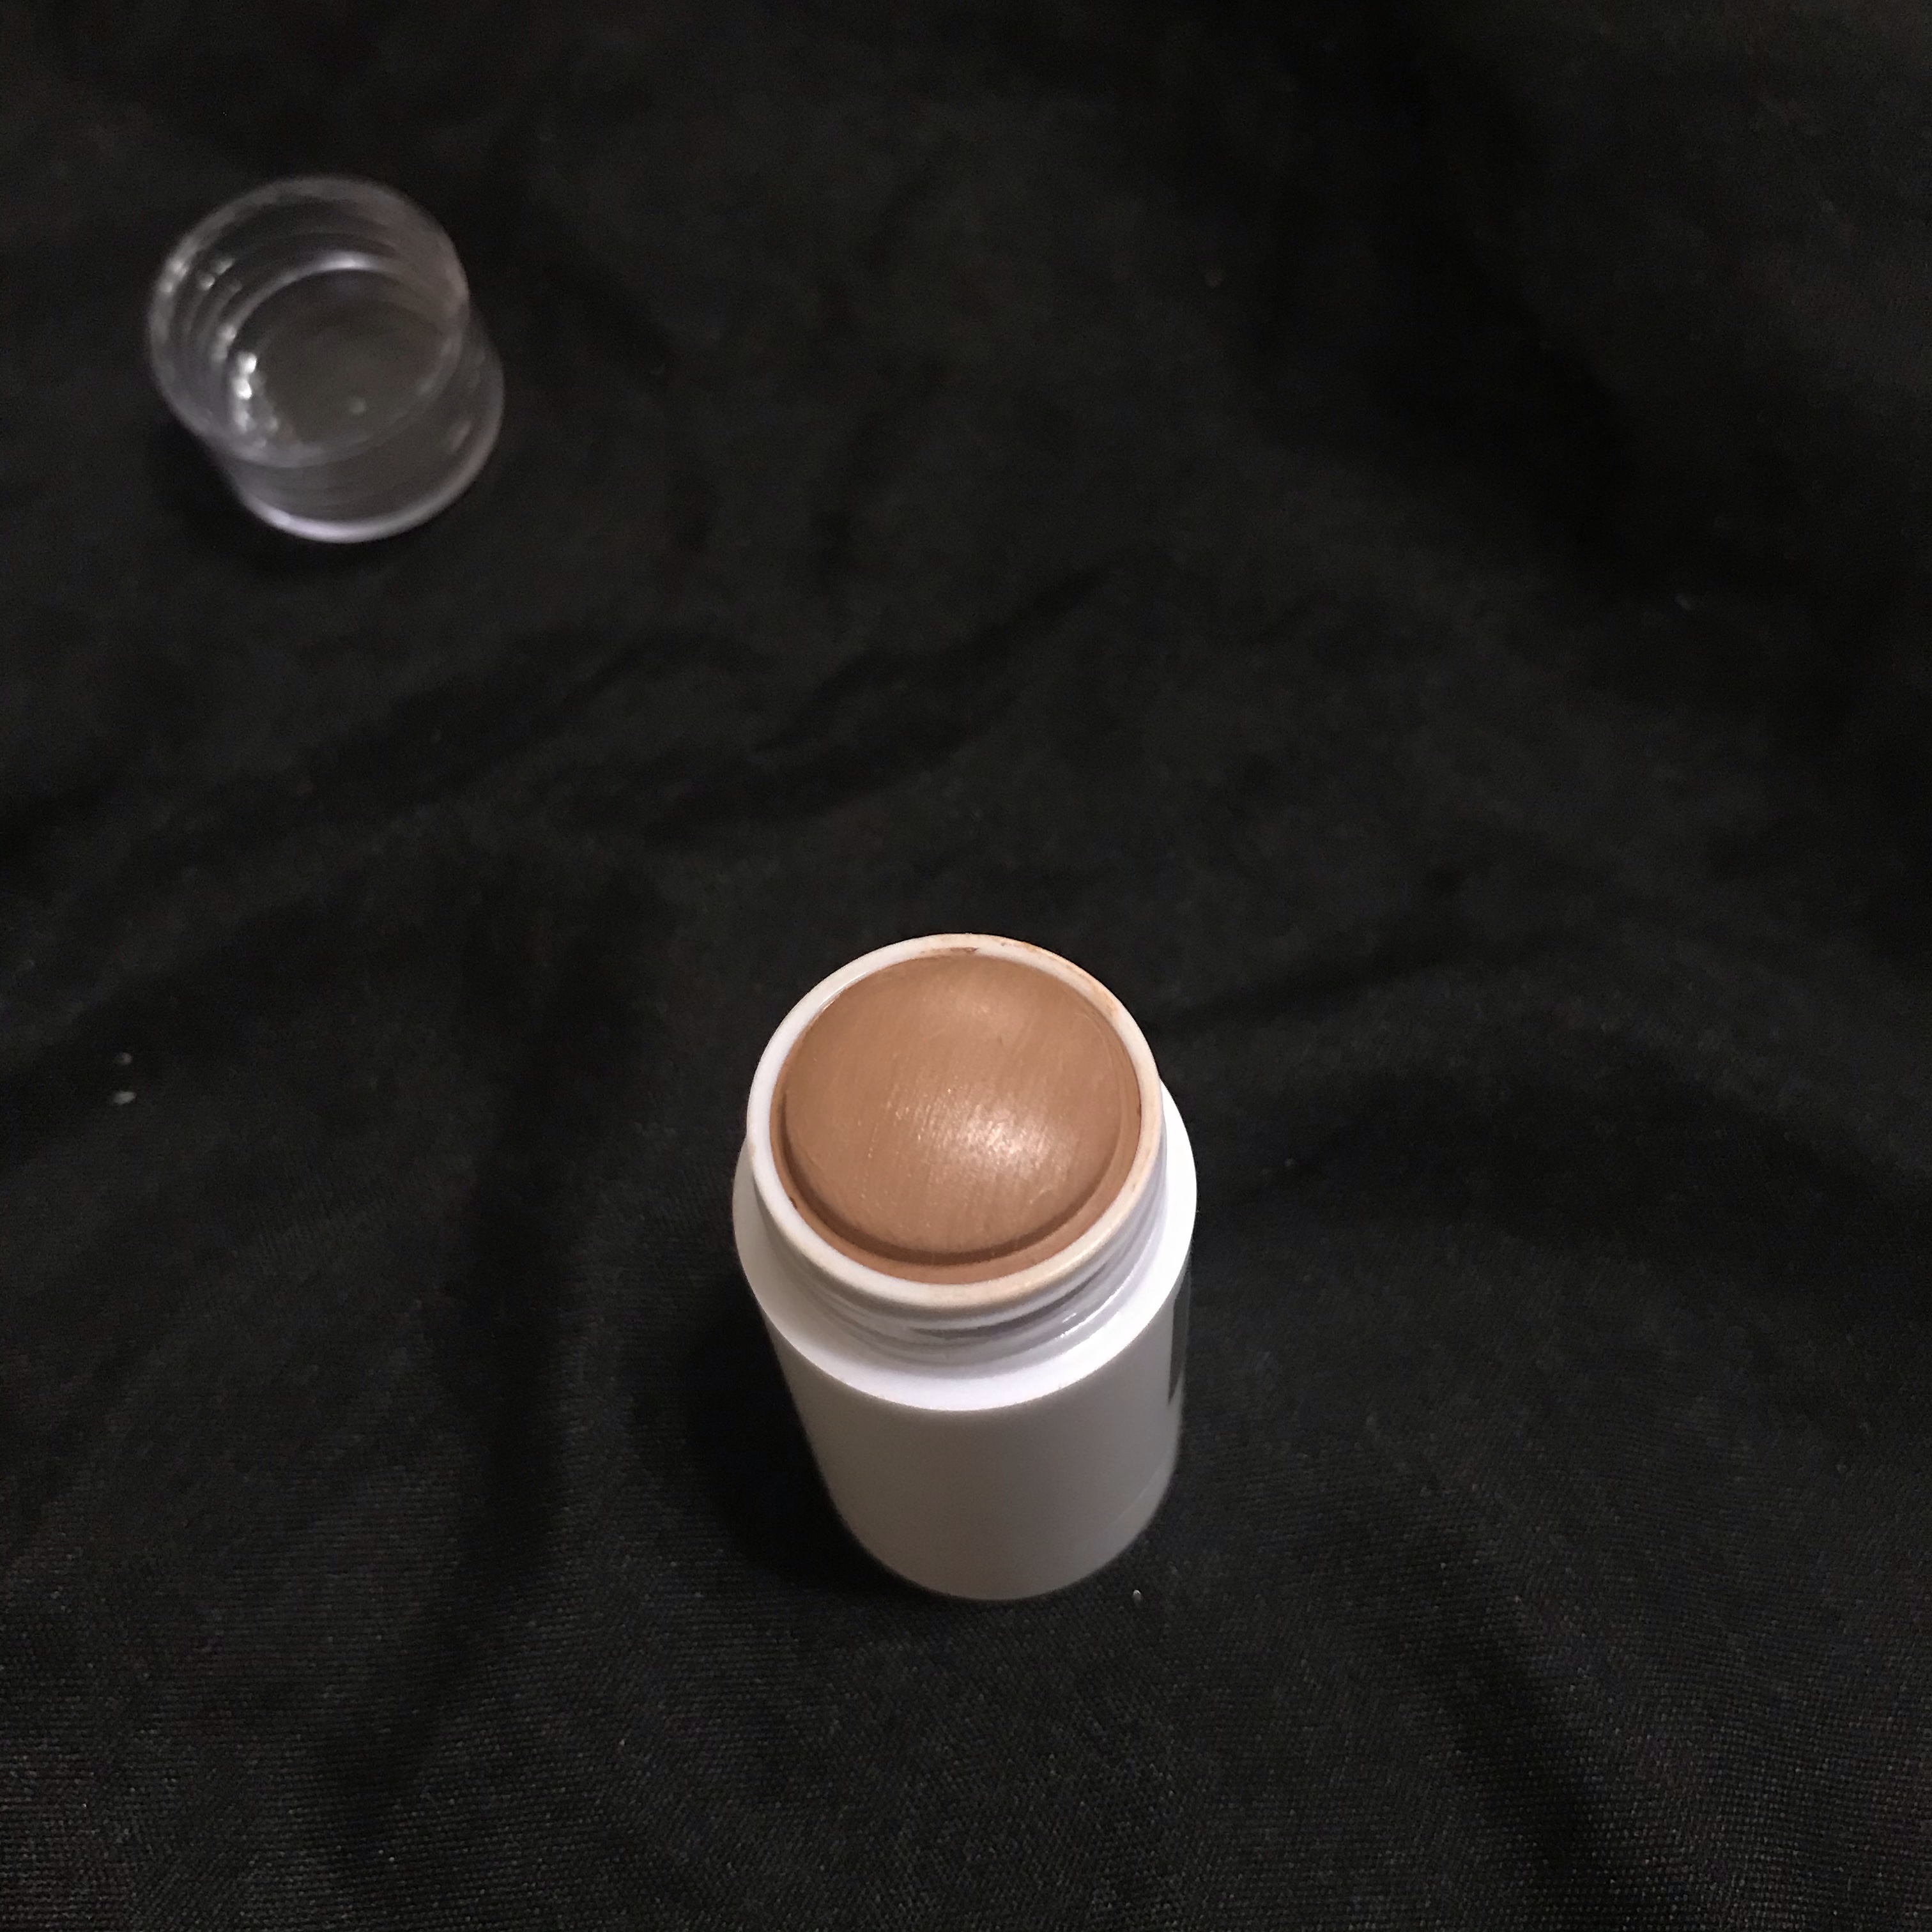
Back in March, I placed a large Sephora haul. In that haul, I picked up the mini version of the Milk Makeup Matte Bronzer in Backed. This is the first Milk Makeup product I have purchased. I’m not usually a fan of liquid or cream products and I am not sure what possessed me to pick up this bronzer, but I am glad I did.

This bronzer is extremely easy to use. I have always been intimidated by cream products and how to use them. To use this product, you simply draw a slight line on the contour of your cheeks, and blend out. My preferred blending techniques is to use a dual fiber small stippling brush and apply minimal pressure while blending in circular motions from the point closest to the mouth, up towards the temple.

The formula of this product is very forgiving and great for beginners, such as myself. You don’t need very much, but if you do apply too much and are worried that you wont be able to blend it out, just do your best, then go over it with a sponge or your foundation brush. The formula has not disrupted the foundation underneath, but if you are concerned about that, you can apply it with a stippling brush by painting the product directly onto the brush then sweeping it in the same motions as mentioned.

My only complaint with this product is the component it comes in. I am only speaking to the mini, as that is the one I picked up, but mine broke the first time I tried to wind it up. Sephora had great customer service and was able to replace it for me, but the second one I received has also broken since then. As I work my way through the product, I will probably have to switch from drawing it on, to using a brush to apply as I will not be able to twist up more product.

Even though I picked up the mini, I think this product will last for a very long time. When I run out, I will be picking it up again, as this product has become a daily step on my makeup routine. I really enjoy this product and recommend it highly!

Meet My Stash: Hourglass Ambient Lighting Blush in Luminous Flush

Today, we are covering what is probably my favorite makeup product of all time. As many in this community have probably heard, the Hourglass powders are incredible. With a formula so finely milled it is nearly impossible for these powders to come across as anything but natural.

It helps that I am a fan of blush in general, so applying these two facts, it is easy to understand why I love this product. The pigmentation is perfect, not too bright.

The color that I have is Luminous Flush, which may come across as extremely intimidating. It’s a bright pink, but with a soft, luminous, beige powder marbled into the pan. I believe that this marbling helps to tone down the brightness and is what causes this blush to look so natural.

My favorite way to apply this blush is on the apples of the cheeks and then sweep is back towards the temple. Then I also apply a bit over the top of my nose to give a “sun-kissed” look. Most will apply a bronzer for this technique but as someone with a ton of redness to their skin who burns easily under the sun, a blush gives me a more natural “sun-kissed” look.

Meet My Stash: Melt Cosmetics Smoke Sessions Palette

Most of the things in my stash are things I hold on to because I love them. To be honest, I hold onto this palette out of spite (lol). This is one of the few makeup purchases I regret.

Don’t get me wrong, this palette has beautiful grungy colors in it, but the formula, from my experience is extremely unstable. As you can see from the pictures inserted, this palette did not hold up over time. My first palette arrived in that condition so I contacted Melt and they shipped me a replacement, no problems. The replacement arrived in great condition but within 2 weeks, it was like the shimmer shadows expanded and were now no longer fitting in the pan.

I do want to say, working with Melt to resolve the issue the first time was a delight. They were very quick to respond and got me a replacement immediately. I just don’t know that I can trust their eyeshadow formula. This is the first and only product I have bought from Melt, but it does give me pause when considering purchasing other palettes.

As for the palette itself, I have de-potted the shimmer shades into loose eyeshadow containers and they still perform beautifully. It saddens me to admit that I love this palette, but I haven’t gotten much use out of it because of the problems it’s brought. I hope, now that those shadows are in their own container and I’m not worried about making a mess every time I open the palette, to get more use out of it.

I will add one more thing to consider with this formula. Now that the shadows are in a loose form, there is A LOT of fallout. Make sure to wet your brush when using these shades this way.

New Makeup Alert! L.A. Girl Shockwave Neon Liner in Fresh

I have found my new favorite colorful eyeliner!! That’s a strong statement, I’m aware, but it needed to be the first thing said. The L.A. Girl Shockwave neon liner in Fresh is a mint green eyeliner that I use for my lower lash line and waterline.

I have always struggled to find a liner formula that will actually stay in the waterline. As many others, my eyes tend to be on the watery side, especially when I use eyeliner (go figure). This is the first formula that I have found to actually stay put. After trying many different formulas, I just figured I’d buy whatever was cheapest since none of them lasted as long as was needed. This formula however, did last! It’s also a bonus that these eyeliners are only $5, very much in the affordable range.

At the end of the night, the color was still put and honestly, was a little difficult to remove. The formula is very creamy, gliding on smoothly and pigmented. The claims of this liner is 16 hour wear time and waterproof, hence the lasting power. Because it is creamy, you can even smudge it out if you are looking for more of a kajal formula.

I have only tried the color Fresh so far, but I completely intend to pick up some of the other colors. You can find these at Ulta or on the L.A. Girl website. The formula comes in 6 colors including a black (which is very intriguing). Don’t let the title of “Neon” scare you because most shades in the eyeliner line seem to be more of a pastel neon.

Meet My Stash: Stila Glitter & Glow Liquid Eyeshadows

Today we are talking about my Stila Glitter & Glow liquid eyeshadows plus a bonus Shimmer & Glow liquid eyeshadow. The purpose of these shadows for my collection is to have a way of adding glitter (or in the one case, a shimmer) to any eye look while not having to mess with loose glitter and glitter glue.

Something that is so unique to this formula is how well the glitter sticks to the eye without having to worry about fallout. Now, I know, this is not as unique anymore. A bunch of brands have now created a formula similar to this, but Stila was the first.

As you can see from the pictures below, my collection is quite extensive for someone who purchased them all myself, but believe it or not, there are tons more. In the Glitter & Glow range there are currently 12 on the Stila website. In the Shimmer & Glow range there are 10 shades and they have released another line called the Suede Shade range that has 8 shades. The most recent addition to Stila’s liquid eyeshadow collection is their Double Dip which has a Suede and Glitter & Glow that magnetize together. I do not currently have any of these but they look like a great solution if you are looking to create a complete look with the liquid eyeshadows.

It is worth noting that while these have little to no fallout and that makes them very easy to use, the different shades tend to dry up rather quickly. I have had some shades for 2 years and they are still going strong while other shades I’ve had for about a year and they are almost completely dried up. I’m not sure what causes the difference in the formulas or how to predict which will last longer. With that in mind, I recommend only picking up shades you know you will use regularly.

All in all, these shadows are useful if you enjoy glitter but don’t want the hassle of dealing with loose glitter, but only pick up the shades you will use.

Meet My Stash: Tarte Double Duty Eye & Cheek Palette In Happy Girls Shine Brighter

This palette is an oldie but a goodie! A staple in my collection (frankly both because of quality and sentimental value), this palette provides an easy on-the-go look.

There are six eyeshadows and a blush in the palette. This is a typical format for Tarte but this one is my favorite because it has a matte black and a matte cream shade. Those are key shadows to have in a palette for a lot of people, myself included. While I can make a look with a palette that doesn’t have those shades, for my everyday look, those are essential.

The blush is a peachy pink blush with a bit of golden glow to it. Now I know that not everyone loves a gooey blush, and when this palette came out, it was not the trend, but I have always enjoyed a little bit of glow to my cheeks. This blush reminds me a lot of Nars Orgasm blush.

In the end, it’s a palette I find myself using when on the go, weather that be traveling or just going out shopping. It has everything I need to complete a look and the pigmentation is strong enough that it lasts all day.

St. Patrick’s Day Palette Recommendations

With St. Patrick’s Day right around the corner, you might be thinking, “what palette should I use, to encapsulate the holiday theme?” Green is a unique color that most really struggle to work with or have a difficult time using in a look. My hope is to help you pick a palette that you may already have in your collection, to help you create a simple, green look to celebrate the holiday.

A common theme you might see when looking at St. Patrick’s Day makeup is the combination of green and gold. The following will go from easiest application to more complicated.

For a simple one-shadow look, L’Oreal Infallible in the shade of Golden Emerald is beautiful if you apply it to the lid, then buff it into the crease. It is worth noting that this shade does have more of a dark base to it so it will still appear a bit smokey even buffed out. This color is green with specks of gold shimmer running throughout so it will give a glam effect when on the eye.

Next is Revlon Photoready Eye Art in Desert Dazzle. This is a dual-sided liquid eyeshadow. One side is an olive green opaque shimmer, while the other side is gold glitter. The simplest look has the green shade swiped on the eye with the gold glitter swept on the lid in either the center for a halo eye, or all over the the lid for a glitter glam effect. It is worth noting, if you haven’t used these in a while, let the green dry down before applying the gold glitter on the eye.

Huda Beauty Emerald Obsessions is another go-to palette when trying to create a green eye look. When looking at this palette, there are many options to go with but trying to keep it simple, take the lightest green shade in the crease, then apply your preferred green or gold shimmer on the lid. If you are taking this on a date night and want a little more depth, add in the darkest matte green or brown to the outer corner of the eye.

ColourPop’s Just My Luck palette is another go-to when creating a deeper green look. This palette has many options for the lid shade, using any of the middle row. Each one will give you a slightly different look, but using the color Chances Are… in the crease will work with any of them. Then you can use Act Natural or Charmed to deepen it up. Mo Bamba is also a great shade to smoke the look up a bit.

While ColourPop’s Mint To Be palette is not difficult to work with, pastels don’t always work best for everyone, so I moved it down the list. This is a great palette if you are looking for a more ethereal look or a daytime look. For the most simple look with this palette, use Get Fresh in the crease with a touch of Seltzer for a gradient look. Then apply Mintea on the lid with Play It Cool on the inner corner. For a fun touch, use Chill Factor to create a smokey liner.

Finally, the e.l.f. Hot Jalapeño quad is great to create a halo eye that is perfect for St. Patrick’s Day. Apply the shades from right to left on the outer and inner portion of the eye moving in towards the middle of the eye. Use the shimmer gold for the center of the lid and use the shimmer green to melt the matte green with the shimmer gold.

This happens to be my favorite holiday and color scheme to wear as it goes so well with my brown eyes so I have A LOT of options available to me. I plan on trying one of these looks out for mine and my husband’s date night in on St. Patrick’s Day. If you plan on doing a look with this color scheme, comment below which palette you will be using!

e.l.f. Poreless Putty Primer

Today, we are talking about the only primer that has helped visibly reduce the pores on my face. If you have large pores or find that your makeup seems cakey on your face, then this primer will help.

The claim on the website is that it is infused with Squalane which will help the makeup maintain throughout the day and helps to lock in the moisture and prevent one from looking dry.

It is worth knowing that there are currently three different types of this formula. The Matte Putty Primer prevents shiny skin and is best for those who are looking for a matte application (as the name would imply). The Luminous Putty Primer is meant to create radiant, glowing skin and is perfect if you are looking for a dewy skin look. The original is the Poreless Putty Primer and is great for creating a smooth canvas to apply your makeup.

To get the best application with the original formula, you will want to smooth it over the skin and then pat it into the skin. This will give the appropriate canvas for all-day wear.

e.l.f. Bite Size Quad in Rose Water

Finally, we have my top ranked quad in this series and this quad is in the shade Rose Water. I LOVE this quad so much! With the same formula as the previous quads, this one has an amazing color story that would flatter many skin tones. The colors in this quad, work perfectly together to create multiple possible looks.

This quad has a matte shade, a shimmer shade, a sequin shade and a foiled shade. The matte shade is the perfect transition shade in a dusty rose that you can build up or softly dust through the crease for different looks. The sequin shade is a deep plum with gold sparkle throughout, but when applied to the eye, it comes across as mostly matte. The shimmer shade is a lovely rose that can be used as a darker lid shade, or you can use the foil shade in the quad that is a light pink.

One thing I really enjoy about this quad is that it can be used for an every day look or you can really foil the shades to amp up the look and create a beautiful glam eye. My preferred look with this quad is to dust the matte rose through the crease, apply the foiled light pink shade on the lid, and then the darker rose shade on the outer corner. Then finish it off with the sequin plum shade as the liner.

What sets this quad above the rest of the quads for me, is the color story and how simple it is to use. I know I can pick up this quad and no matter what look I create, it always looks good. I highly recommend this quad, especially for beginners or those who want an easy quad to work with.

If you haven’t seen my whole series, start with this review!

e.l.f. Bite Size Quad in Hot Jalapeño

Coming in at second place, we have the Hot Jalapeño quad. This colorful quad is a range of greens with a pop of gold. The formula in this quad is the same as the other quads, creamy and blendable with great pigmentation. This quad has two matte shades, a shimmer shade and foil shade. The matte shades are the darkest shades in the palette, a forest green and an olive green to provide some depth to this quad. The shimmer is an olive green with a hint of gold in it. The foil shade is the brilliant pop of gold that perfectly accents this quad.

This quad comes in at second place because I love to wear green and these shades are extremely wearable. Green can intimidate a lot of people but I feel this quad is a great quad to dip your toes in with. This quad, while extremely colorful, allows for a simple use of the color.

I have my favorite look (a halo eye, using every color in the quad) but that is not the look I am going to explain today, as it is a bit more complicated. The look that is easiest to do but has a great use of the colors in this quad is as follows: Take the matte olive green through the crease, use a light hand and build the color to the desired opacity. Then take the foiled gold color all over the lid. Finish the look off with a shadow liner using the matte forest green. This look, while using two of the three green shades will focus on the gold which most people are more comfortable wearing.

Check out the first review in this series!